
Easy Christmas Sensory Bags For Babies – DIY
Tummy time is usually not a favorite baby activity, so to keep things interesting you can make DIY dollar store sensory bags.
This post may contain affiliate links. For my full disclosure policy click here.
Since Christmas is around the corner I made up these Christmas Sensory Bags For Babies to keep my little one on his tummy longer.
Sensory Bags – Why they are so great
These bags expose your baby to different textures, shapes and colors. They engage your baby and help their developing minds.
Tummy time is necessary to help strengthen neck and arm muscles and these bags will help keep your baby engaged longer.
For other brain building baby activities check out these posts too:
How to Raise Smart Kids? Play This Classic Game Before They Can Talk
5 Baby Activities to Stimulate Your Newborn
Easy Christmas Sensory Bags For Babies – DIY
 Print
Print
These easy DIY dollar store Christmas Sensory Bags can be made up quickly while baby naps and be used all holiday season for tummy time.
Advisory: Precautions were taken to keep the bags safe, but adult supervision is always required. Do not leave your baby unattended with these bags
PREP TIME 5 minutes
ACTIVE TIME 25 minutes
TOTAL TIME 30 minutes
DIFFICULTY Easy
ESTIMATED COST $10
Materials
- Freezer size clear bags
- Liquid soap and/or hand sanitizer and/or hair gel
- Tape – Christmas colors
- Glue
- Christmas sensory items: buttons, foam stickers, pom poms
Tools
- n/a
Instructions
1. Fill one freezer bag with your chosen liquid. Fill 1“ to 1½” depending on how squishy you want it.
2. Add the sensory items
3. Seal the bag pushing out extra air
4. Glue the seal of the freezer bag
5. Place full bag into another clear bag gluing it in place in the corners and along the edges. Let dry for a few minutes. In the meantime, you can start the next bag.
6. Place tape all around the sides of the bag (mostly just for appearance), but also adds extra sealing to the bags opening.
I found awesome Christmas colored shiny tape, but colored duct tape will do as well. Ensure the edges aren’t sharp, you can fold the tape over to create smoother edges.
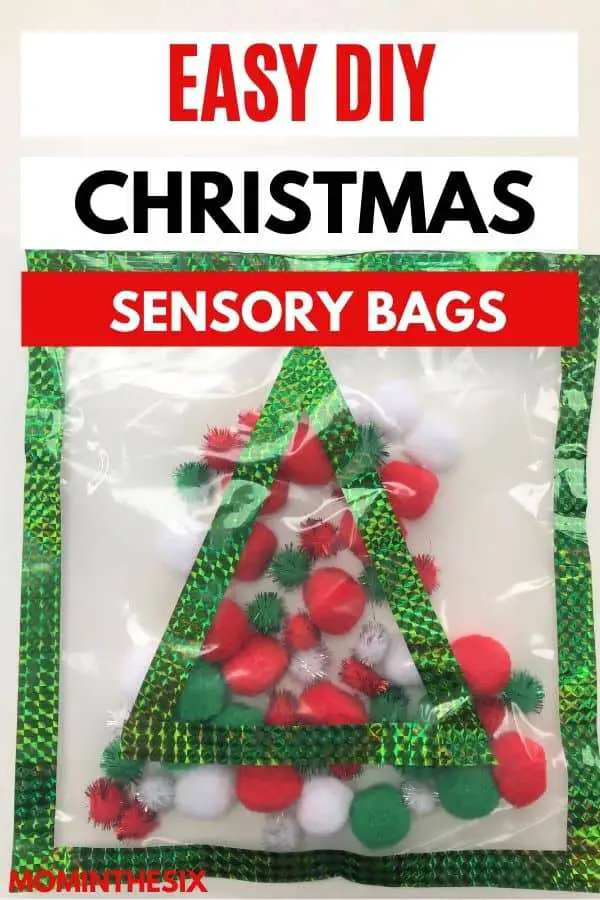
7. If you want you can also tape on a Christmas tree design to make a bag extra fun. I did it with the pom poms pictured above since I didn’t use any liquid, but wanted to add something fun.
Notes

1. Buy bags without printing on them
2. Look for liquids like soap that are clear. I couldn’t find hair gel so chose to use hand sanitizer and soap. Both provide different sensory experiences.
3. For extra security – Glue the clear bags closed and double bag the sensory bags to avoid any little finger nails opening them up.
Glue the second bag into the other bag by the corners so there isn’t slippage. I used gorilla glue. Don’t use a glue gun or the plastic will melt.
4. For fabric items you don’t have to add liquid. You can leave a little air in the bag to add the squish-factor. Ex Pom Poms.
Recommended Products
As an Amazon Associate and member of other affiliate programs, I earn from qualifying purchases.
© Mom in the Six
PROJECT TYPE: Baby Craft
CATEGORY: Activities