
DIY – Baby Flower Headbands
Creating beautiful baby headbands does not need to be hard. Read on for my simple 5 steps to DIY baby flower headbands.
When I found out I was pregnant, my husband I decided not to find out the baby’s gender, but I was convinced I was having a boy.
This post may contain affiliate links. For my full disclosure policy click here.
Why? Well, I had a few things happen during my pregnancy to make me think so.
The first was the ultrasound technician saying “he” during a follow up appointment.
During the first appointment I made it very clear that I did not want to know the gender, then at the follow up I didn’t mention that I didn’t want to know, since it was the same technician
I don’t know why, I was pregnant and who knows what I was thinking! And of course when the technician said “he” once during the appointment I thought I had ruined my surprise.
Afterwards I tried to convince myself that they probably use that pronoun regardless or I had misheard. I didn’t tell my husband just in case. I didn’t want to ruin his surprise.
The second reason: At one of my last appointments I had to go to a new doctor, while mine was on vacation and the nurse at her office said “you are having a boy right?”
She further explained that the heart rate was slow and that’s usually a boy. Since the technician slipped already I wasn’t too upset about this nurse potentially ruining my surprise.
So I was extremely excited and shocked when Chris told me it was a girl when she arrived! I would never ever ever change my decision on not finding out before. Best surprise of my life! So now I had to wrap my head around having a girl!
I’ve never really liked the whole girls have to wear all pink and be little princesses, so I often dress Brooklyn in grey, blue and beige.
This leads to strangers saying “what a cute boy”, which is ok, but sometimes I want to “girly up” an outfit so I have started to add a baby flower headband. I saw a few baby headbands in store and they were upwards of $20 each! I just couldn’t justify it so decided to investigate making my own.
I am not a DIYer by any means, but this is so easy even I can do it. Which means yours will probably turn out even nicer than mine!
This post contains affiliate links. Click here for my full disclosure policy.

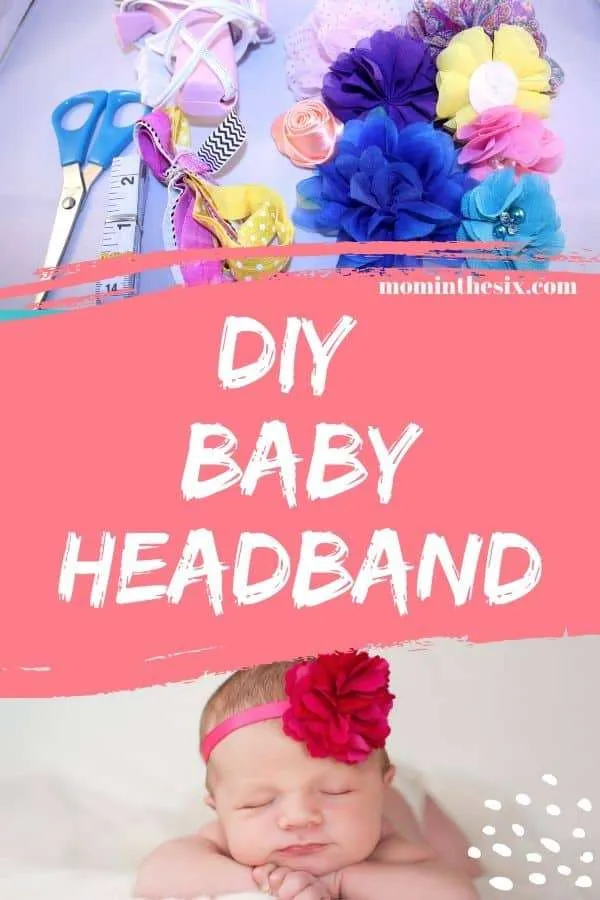
Tools:
- Headband elastic – I have bought from this Etsy shop multiple times and have loved what I received every time. I bought the Grab Bag so I got a variety of colors and styles.
- Fabric flowers – the trick here is to have the felt piece on the back so you can glue it. Same Etsy store as above – I purchase the Grab Bag. They are all done for you and come in multiple colors and styles.
- Glue gun and glue – I bought a cheap one at Walmart for less than $10. Here is the same brand at Amazon.
- Ruler or measuring tape
- Scissors
Here are general measurements you can use for your baby headband elastic (or just wrap around your baby’s head if they are in a cooperating mood):
Newborn – 12.5″
0-6 Month – 13.5″
6-12 Month – 14.5″
Steps:
1. Gather the following:
- Flowers with felt backing
- Elastic Ribbon
- Scissors
- Glue Gun
- Measuring Tape
2. Measure and cut the ribbon to desired length, adding 1 inch extra for the next step
3. Glue the elastic together by overlapping the ends by an inch
4. Place a small amount of glue on the back of the felt flower in the center. Carefully place on to the ribbon.
5. Let the glue dry on your headband for at least 5 minutes. Done. Easy Peasy.